About this tutorialThis is an end-to-end guide to integrating a CCAvenue payment gateway into ASP.NET web application using official kit. Starting from account setup to successful payment.
Pre-Requirement
- Visual Studio
- Active CCAvenue account
- Merchant ID
- Access Code
- Working Key
- Official CCAvenue kit
- Little knowledge about C# & ASP.NET
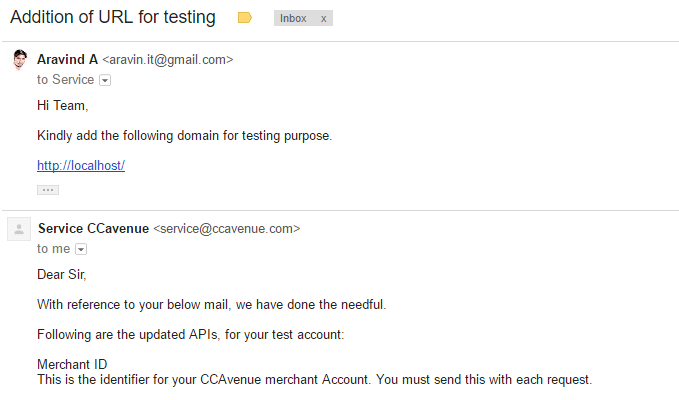
Setting up your CCAvenue account for localhostIn order to run your CCAvenuepayment gateway in localhost, we need to add our localhost into CCAvenue account. You have to write an email to [email protected] and ask him to add your localhost. Kindly refer screenshot below for more details.
Example: http://localhost:55181/
Screenshot 1
Download Integration Kit from CCAvenue websiteIntegration kit will be available on http://ccavenue.com → Resources → Web Integration Kit → Download Integration Kit → Download ASP.NET 3.5

Also, you can download from here: ASP.Net_Kit_Version_3.5
Extract the Integration Kit
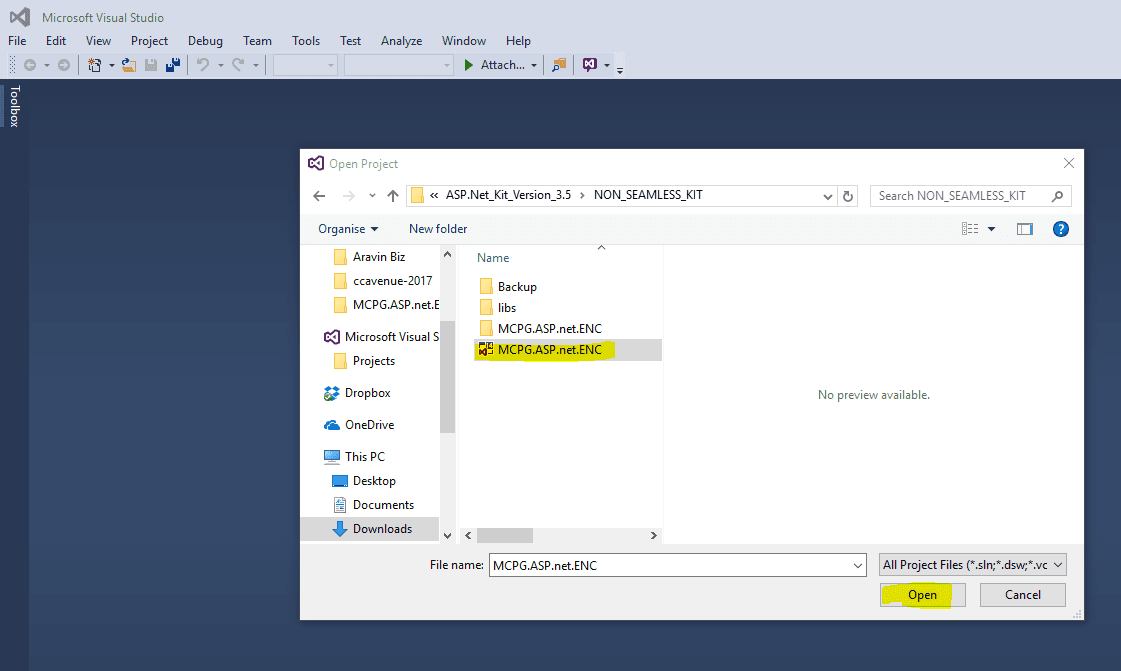
Open the Project in Visual Studio
- Open Visual Studio
- Choose Open → Project/Solution from the file menu.

- Browse to the downloaded Integration kit. Open the
NON-SEAMLESS KIT

- Open
MCPG.ASP.net.ENC
Add Reference to the project [Very Important]Many people used to face an issue in this stage. But it is really an easy step. Kindly follow the screenshot.
Right-click the References in solution explorer → Add Reference

Note: Reference DLL file will be available in downloaded integration kit itself.
Browse the downloaded folder
- bin → MCPG.ASP.net.ENC.dll & add it to the project.
- lib → MCPG.CCA.Util.dll & add it to project.
Note: REMOVE existing dll, if any. You have to add fresh dll.
Add localhost to the projectThis step is mandatory to run the CCAvenue setup in local system i.e in a development system. If you didn't ask localhost, this setup won't work because by default asp.net project will point to some default IP like http://127.0.0.1/
So, better add your localhost i.e In my case it is which http://localhost:55181/ is same as in my CCAvenue Account, which we have added in step 1.
Right click project → Properties

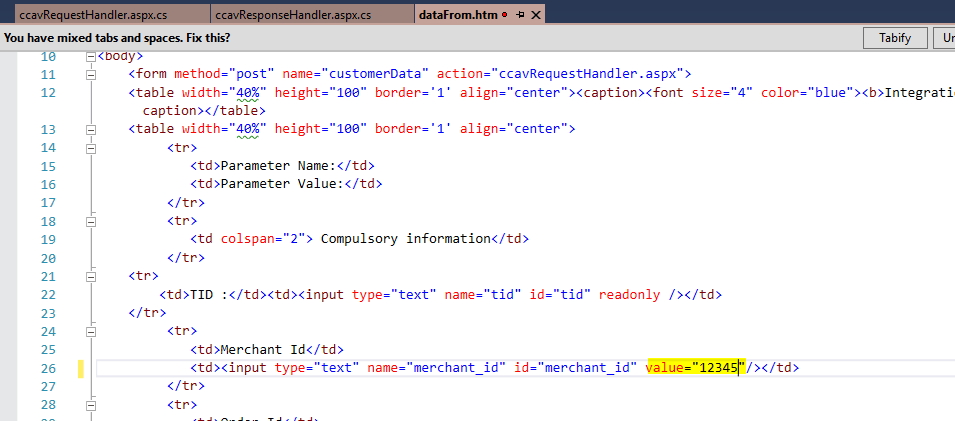
Change Merchant ID, Acess Code and Working Key in our applicationPages to be modified:-
- ccavRequestHandler.aspx.cs
- ccavResponseHandler.aspx.cs
- dataFrom.htmChange workingKey and strAccessCode in ccavRequestHandler.aspx.cs 
Change workingKey again in ccavResponseHandler.aspx.cs

Change merchant_id, redirect_url, cancel_url - VERY IMPORTANT
Great :) If you followed all the step, you can build & run
Choose between Testing/Live environmentYou can choose Testing or Live environment from the ccavRequestHandler.aspx
For Live Environment
https://secure.ccavenue.com/transaction/transaction.do?command=initiateTransaction
For Testing Environment
https://test.ccavenue.com/transaction/transaction.do?command=initiateTransaction
Making Payment in Live (Production) EnvironmentRun the application, you will see the following account.
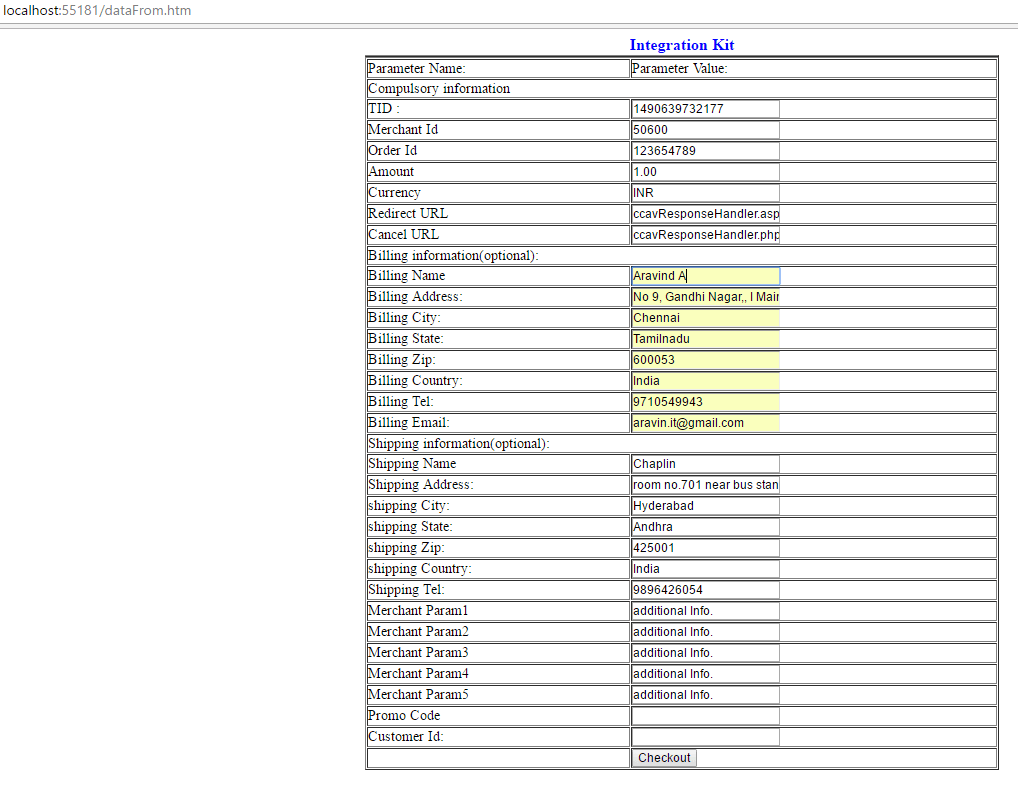
Fill the details & Proceed to checkout
Choose the preferred payment gateway from Credit Card/Debit Card/Net Baking etc..
Enter the required details and click on make payment

Finally, Complete the payment :)
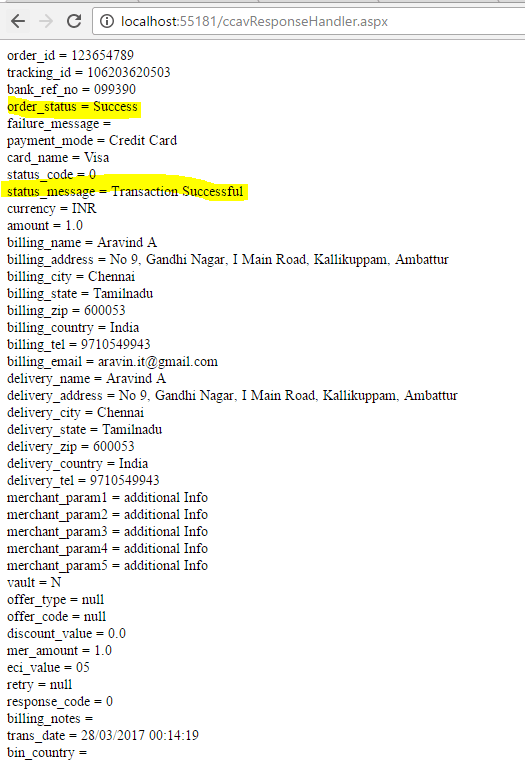
That's all :) You can push your code to Live Website :)
I tried my best to cover all the steps in screenshot & steps. If I missed any steps, kindly drop the queries in a comment section.
Also, for any clarification or doubt, please write back to me on comment section. I will try to reply as soon as possible.

Aravin